Gnome Christmas Ornament Pattern & Tutorial

Hi sewing friends! It’s past Thanksgiving now so that means I can go full blown Christmas. Woohoo! I have lots of fun holiday goodness coming your way. First, for all you gnome lovers, I’ve put together a fun little project. It’s a fast sew and you can personalize them in so many ways. I’ve seen gnomes done up for just about every holiday under the sun. Super fun! Let’s get going.
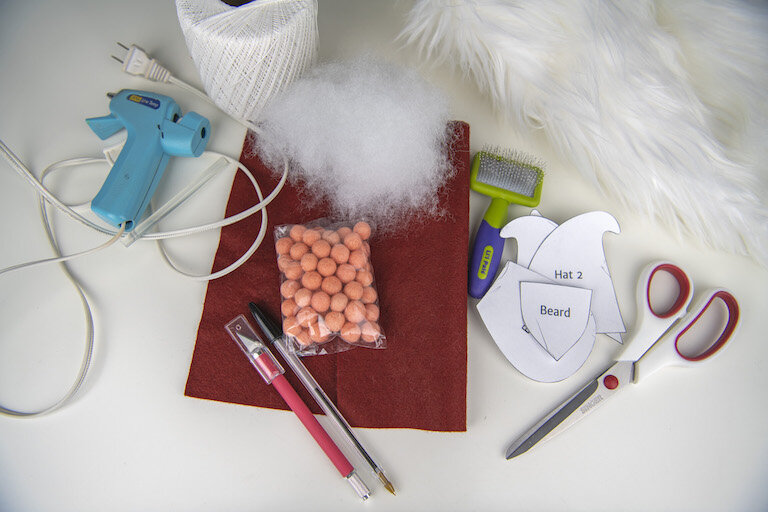
Supplies:
1 Sheet of Felt
Small amount of batting
Faux Fur (about ⅛ a yard, see notes below)
1 cm Felted ball for nose (see notes)
Hat Emblishments (optional)
Something to trace with (pen)
Glue gun/Glue Stick
Embroidry Floss
Sewing Machine/thread
Scissors
Dog Slicker (optional)
Notes: I prefer getting my felt sheets at Hobby Lobby. They have a ton of colors to choose from and they are the best price I’ve found. You can also buy felt by the yard.
I picked up my faux fur from Joann’s. It is pricey but you only need about 3 inches. You can also buy it by the sheet on Amazon. I bought a dog slicker (a soft brush used on dog’s coats) after seeing someone else suggest it when working with fur. It brushes out the excess fur that is no longer attached to the backing and smooths out the fur so it has a nice clean look. Totally optional, of course, but I am a fan. It makes for way less fluff to clean up after working with a messy fabric.
I purchased the felted balls I used for the noses from this Etsy seller. I ordered the “blush” color. I also purchased some of her 2.5” felted ball sets to make my gnomes into a banner (photo of the banner version is at the end of this post).
Ok, let’s get started.

Print and cut out your pattern. Choose which hat style you’d like your gnome to have. Take your felt sheet and fold it in half. Lay your hat pattern and your gnome’s body on top of the felt. Trace one of each. Take a few straight pins to hold the two layers of felt together.

We will be sewing around our traced shapes on our drawn line. So no seam allowance. Do not sew along the top straight edge of your body or along the bottom opening of the hat. Do remember to back-stitch at the beginning and end. I’ve used white thread so you can see what I’m describing better but I suggest using a coordinating thread.
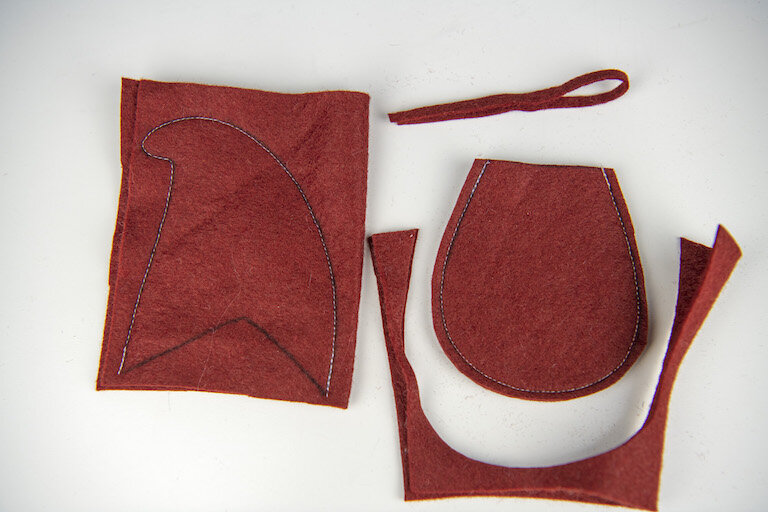
Once you have sewn around your pattern pieces cut them out. On the body cut on the line at the top opening and then cut using a ⅛-inch seam allowance outside of your sewn line.

For hat 1 and 3 cut straight across at the hat opening so the back of your hat is straight and then trim the rounded edge or triangle cut out only on the front side. Trim around the rest of the hat using the same ⅛-inch seam allowance outside your sewn line.

Turn both pieces right side out and using a barrier cloth (just a scrap of cotton fabric) press your pieces flat. Felt will melt with direct heat.

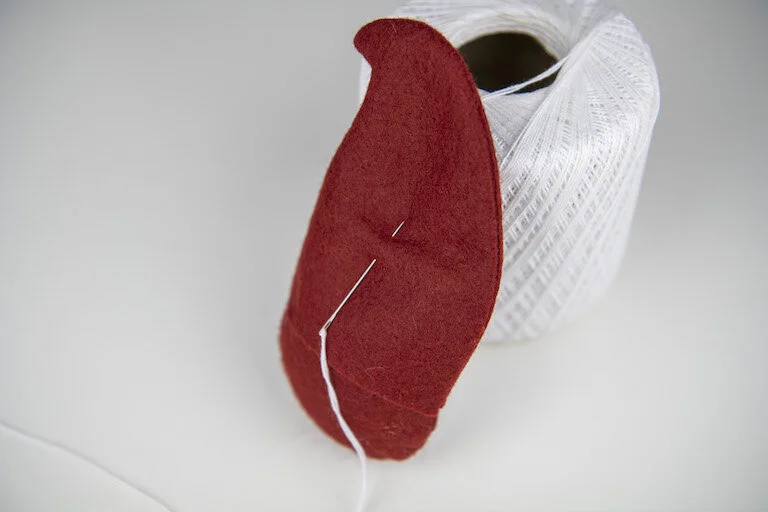
Stuff your gnome body and then stitch the opening closed. Set aside.

Now let’s cut out his beard. Grab your faux fur fabric and your beard pattern. On the backside of your fur trace one beard. Take your craft knife and cut the beard out on the line from the backing side (as you can see I’ve made a lot of gnomes already, ha!). This will cut the backing only and leave the fur long. If you cut it with scissors your beard will end up short and the fur will be wonky like he’s been given a bad beard trim.

Once your beard is cut out use your dog slicker to get all the fur to lay flat and to get the strands that are no longer embedded in the backing out.

Line the beard up with the top of your gnome body and attach it with one straight line sewn across the top. That is our last step with the sewing machine. Heat up your glue gun.

Set the body aside and embellish your gnomes hat to your liking. I usually just add some hand stitched details or a button. For hat style 2 you can fold up the front or leave it down. It’d also be cute made with knit so that it’s more of a slouchy hat. :) So many options.

Once you have your gnomes hat all fancy, place it on top of your gnome's body. Your beard should be poking out from under the front of the hat.

Once you have the hat situated just like you like it add a row of hot glue just under the edge of the hat in the back to hold it in place.

Next grab your felted ball nose and glue it in place centered just below the hat on top of his beard.
Last of all you just need to add a string to hang it on your tree or you can string it on a banner. Add the string in the back right at the top of your body.

Add the string vertically for an ornament (tie a knot in the thread and cut off excess) and horizontally for a banner. I’m sure there's a lot of other fabulous ideas ya’ll will come up with to use these little guys, too. Please share them with me by tagging me on Insta @stubbornlycrafty or #scpatterns. Thanks so much for making it all the way to the end and I hope you love your gnome ornament as much as I love them.