Fruit Applique Embroidery Pattern and Tutorial

Hi, friends! Today I have a fun applique pattern to share with a quick tutorial. I love to applique. I adore the added details it gives to a project. I have a few projects to share with you that I use the fruit on as well as a step by step tutorial on how to do it yourself in case you’ve never appliqued before.

In the tutorial I used quilters cotton which is a raw edge applique, meaning the edges will fray some as time goes on. If you do not want your edges to fray you can zig-zag stitch around the edges which will limit the fraying or you can use a fabric that doesn’t fray like felt. If using felt make sure to use a barrier cloth (an extra piece of cotton fabric will do) between the iron and the felt to avoid melting.

I also have a great love for vinyl lately. You can get it at Joann’s or I just bought a bunch on Amazon. Shipping is the same price no matter how many yards you buy. If using vinyl instead of Wonder Under, since the heat will melt it, I trace the pieces on the back, cut them out, and use Spray n’ Bond Basting Adhesive to hold the pieces in place so I can stitch them down. I use my same sewing machine, sewing foot, and needle on the vinyl I use with my cotton or canvas fabrics.
SUPPLIES
Fabric scraps
Pellon Wonder Under
Thread/Embroidery Floss
Frixion Pen (optional)
Alright, let’s do this!
First, print out the pattern. You can download it here. Cut out the pieces for the variety of fruit you’ll be making. We’ve color coordinated them for you so you can tell which pieces go together. The other sheet is to help you with placement.
For the tutorial, I picked the apple. Decide what project you want your fruit applique to go on. As you can see, I’ve done kitchen towels, wallets, and baskets. I’ve also done gift tags for jars of jam, baby onesies, and I’ve used them to trace for embroidery projects as well.
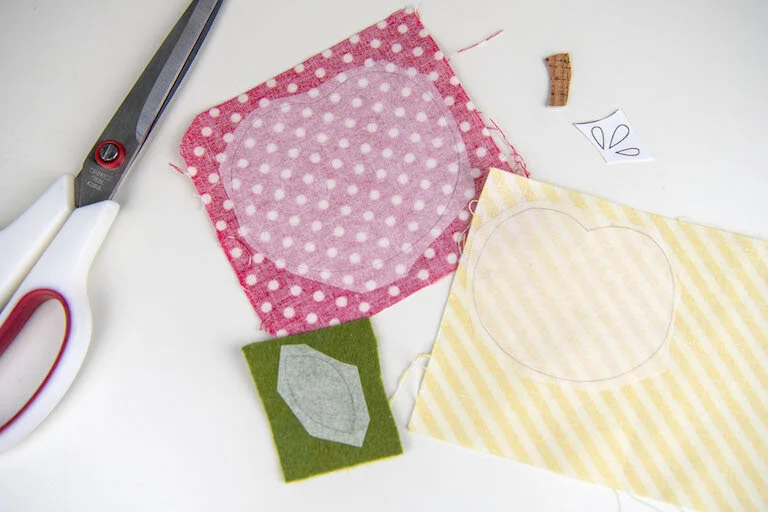
Once you have your project picked out and the pieces cut out, choose what fabrics you’d like. You just need small scraps. Iron them so they are nice and flat. Grab some Pellon Wonder Under. Trace your pattern pieces on the smooth side of the Wonder Under. Iron the Wonder Under on to your fabrics follow the directions on the package. Remember to use a barrier fabric if using a fabric that will melt.
Once they are ironed on, cut out your pieces. You can trace the seeds on to the Wonder Under and use fabric for them as well but I thought I’d show you another variation for this tutorial so I skipped this step.

To get the Wonder Under paper off the back of your pieces, use a straight pin to lightly scratch the paper in the middle of your shape and then peel it off. If you pull it up from an outside edge it will sometimes cause fraying. This process will avoid that.

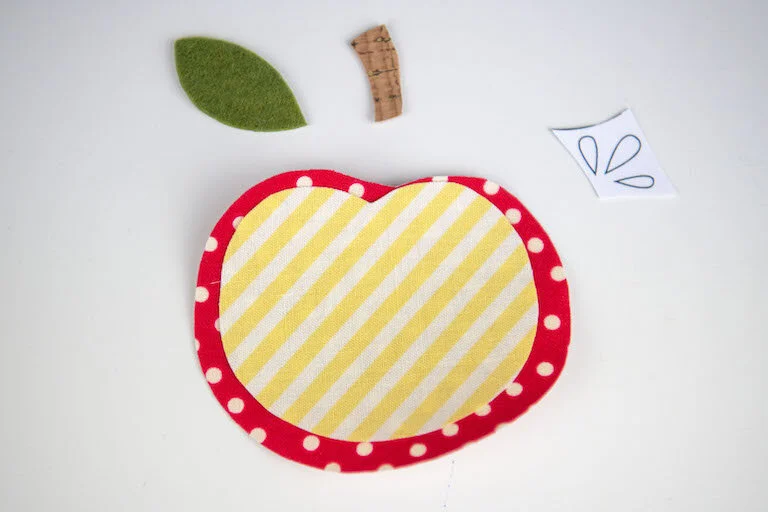
Ok, we start from the bottom layer up. So the stem will be placed first. To find the placement for the stem, place your apple piece where you’d like it. I used a Frixion pen to mark a line in the middle of my project to center it and keep it straight. Once you’ve figured out your placement, slide the stem into place just under the top center of the apple. You want the apple to just overlap the bottom edge of the stem. Move the apple and iron into place. I used cork, so I used the Spray n’ Bond for that piece.

Take to your sewing machine and sew around the perimeter. Do not back-stitch.

For applique, instead of backstitching, pull the threads to the back of your project, tie a knot, and cut off the excess. This helps make a cleaner look on the front of your project.

Now put the apple back in place. Iron it down and then sew around the perimeter. Pull your threads to the back and tie off.

Repeat with the middle of your apple.

Alright, here is a variation for the apple seeds. I used the placement pattern piece and carefully cut out the seeds. Then I placed the pattern over my applique apple and traced the seeds with a Frixion pen.

Remove the pattern and grab a needle and thread, or you can use your machine if you are that skilled and can sew around those tiny seeds. I doubled up my thread and made tiny hand stitches around each seed. I’m using a backstitch.
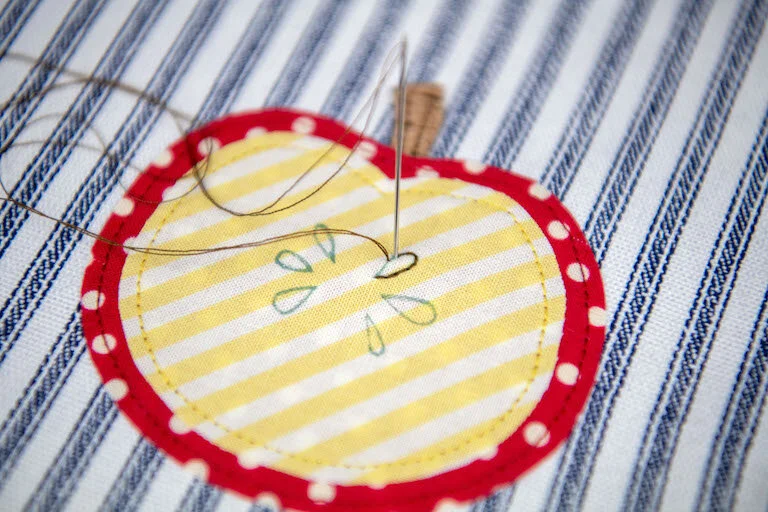
To do a backstitch, make your first stitch and then have your next stitch come up a stitch away from the first. Put your needle back down in the same hole of your first stitch. Repeat. Tie off in the back when finished.
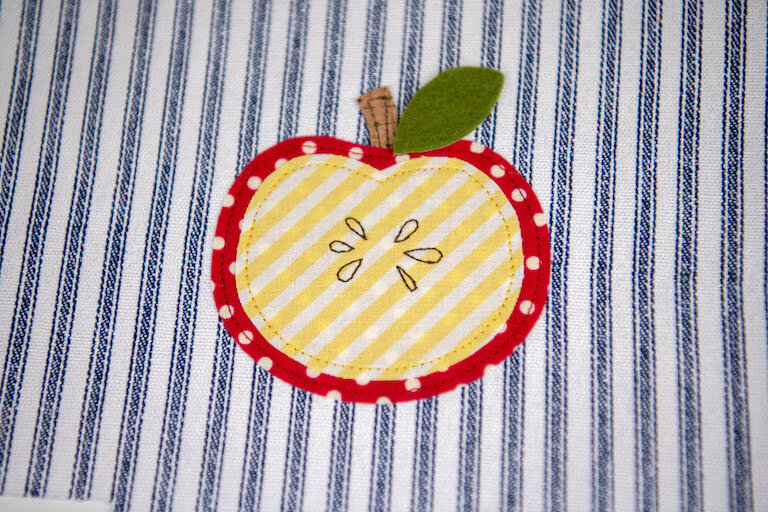
Now all you have left to do is add the leaf.

Thanks for sewing along with me today. I’ll be back with a pattern and tutorial for what I made my finished apple into soon. Here’s a photo of the first project I made with the fruit applique, a kitchen towel set.